Best viewed using:
Internet Explorer
or
Mozilla Firefox
Using our Switching Power Supplies
While these little supplies have the appearance of those "battery eliminator" DC plug-ins, and are about the same size, don't be fooled. These switching supplies are a very sophisticated, well protected, regulating DC power source. Because the DC output is highly regulated and very pure, it is ideally suited for powering lighting projects containing LEDs.
To ensure optimum performance as a voltage source for your lighting needs, we recommend the following guidelines:
-
Only use this supply in an indoor environment.
-
Make sure the total of all circuits connected to any one supply does not exceed 1500ma (1.5 Amps) for the 12-volt supply, and 1000ma (1.0 Amps) for the 18-volt supply.
-
If supplying multiple circuits connected via a "power bus" structure, the end-to-end length of the bus should not exceed 18 feet for 25 feet for 12-volts, or 35 feet for 18-volts.
-
18AWG single conductor insulated copper wire is a good choice for power bus applications. It will carry more than 2 Amps so it is more than adequate for any of our power supplies.
-
A switched AC input is recommended to power-down the supply during extended periods of non-use.
-
Do not connect multiple supplies in parallel (for more power), or in series (for higher voltage output).
-
Ensure power output wires (white-striped is + DC output) are either firmly connected to screw terminals or soldered to circuitry to prevent intermittent power output and voltage regulation problems.
Circuit Boards for Lighting Projects
If your planning a lighting project that will include more than just a single LED, we recommend using some kind of small PC (printed circuit) board to solder your resistors, LED hookup wires, power wires, and any switch wiring to. This makes a tidy place to connect everything that can be centrally located. It also makes it easier if you need to add a few lights in the general vicinity or make other changes at some future time.
Further, if you're planning a larger project or multiple ones at different places on a layout, these "sub-boards" can easily be mounted under the layout and interconnected for power hookup to a single power source, by using a power bus wiring scheme.
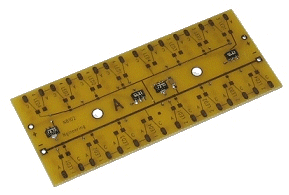
For those of you considering this approach, we've developed a circuit board to cover a very wide range of LED hookup options. Our N8102 LED Power Distribution Board can handle up to 28 LED connections and will support series or parallel connections. These boards can be easily daisy-chained together to support power bus wiring for multiple lighting districts. Our N8105 LED Power Distribution Jr. can handle up to 8 LED connections. These can also be part of a power bus for wiring of multiple lighting districts.

Wiring up multiple "sub-boards" to a common power source is an efficient way to share a power supply. This is commonly referred to as a power bus and there are several things to remember when using this wiring scheme:
-
The sum of current consumed by all sub-board circuits must not exceed the total output capability of the common-source power supply.
-
To minimize voltage drop due to the inherent resistance in wiring, the total length of the power bus should not exceed the lengths noted above. Feeder wires running from sub-boards to switches or lights (LEDs) should be a maximum of 5 feet in length.
-
Only one power source is used per power bus.
-
The AC input for power supply(s) should be a switched circuit for safe and easy on/off control.
-
All wire joints should be soldered for secure connections.
-
18AWG single-conductor insulated copper wire is recommended between sub-boards.
Below is a schematic example of a typical power bus arrangement:

© 2025 Ngineering


