


Best viewed using:
Internet Explorer
or
Mozilla Firefox


Flaring tubing in preparation for mounting lampshades
There are basically, two different methods of flaring the end of a segment of our stainless steel thin-wall tubing.
The first, is quite simple and is applicable for our N2018 (0.018" diameter) and N2025 (0.025" diameter) tubes. We refer to this method as "cold flaring" because it is a one-step process that does not require any annealing (softening) of the tubing end. The larger diameter tubing (.032" diameter and larger) has a bigger material cross-section, and typically thicker tubing wall which makes the cold flaring process much more difficult. For these larger sizes, we first anneal the tip-end of the tubing. Flaring is then, very easily performed.
Cold flaring of tubing:
Once a tubing segment has been cut to length and deburred, it can be flared.
-
The easiest way we've found so far is to slide a .012" support wire into the tube with a slight bend in the wire so it will stay in position in the tube. Clamp the tube firmly in a pin vise with the end of the tube just protruding past the jaws of the pin vise (about 1-2 tube diameters or so). Position the support wire slightly recessed from the end of the tube (maybe even with the pin vise jaws or slightly farther in. Make sure the tube is tightly clamped by the pin vise.
-
Hold the pin-vise vertically with the exposed tube end facing up. If a long section of tubing is to be flared, we recommend using pin-vises made by the L. S. Starrett Tool Company, because their pin-vises have open ended jaws so the tubing can slide all the way through the vise and out the back of the vise handle. Some cheaper pi-vises have solid-backed jaws which don't allow material to be pushed in past the jaw teeth.
-
We have found a simple method of supporting the pin-vise in vertical position on the workbench is the use a piece of metal (steel, aluminum, or brass) with a hole drilled through near one end that the vise handle can slide through and stop at the back of the vise head. Figures 1 and 2 below show the holding method.
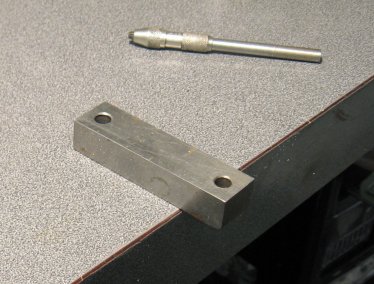
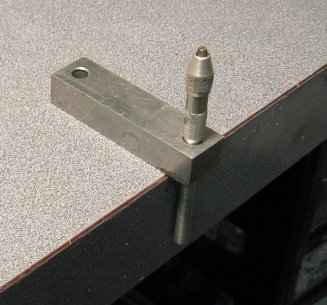
Figure 1 Figure 2
-
Be sure the tubing is tightened firmly in the jaws of the pin-vise. Even though the smaller tubing is very thin-walled, it can be held tightly in the vise without damaging (crushing) it.
-
Choose a carbide scribe, compass scribe pin, dental pick point, small steel pin ground to a tapered point, or even a ordinary straight pin. This will be your "flaring tool".
-
Place the pointed tip into the tubing end and tap firmly (but not too heavily handed) on the back end. You may need to inspect and repeat tapping to get the slight flare you want, but once you've done this one time, it will be easy to repeat the process.
-
The amount of flare at the end of the tube does not need to be very much. When the lampshade is hole-punched with the correct size drill for the tubing being used, the shade will fit very closely on the tubing. Only a slight flare is needed to hold the shade in position and the epoxying operation to hold these two parts together is where all of the strength is achieved.
-
You will find that there is a bit of trial and error when doing this operation. If you tap too hard, the tubing will disappear down into the pin-vise. Not hard enough, and the tubing won't flare enough. You may find that the pin-vise jaws need to be tightened more to hold the tubing more firmly. It is possible to over-tighten and cause some deformation of the tube, but that requires very sever tightening in most cases. After one tube has been flared, you will know the correct pin-vise tightening and tapping that works for you.
Flaring annealed tubing:
-
Out stainless steel tubing is manufactured with a heat treatment that gives it good hardness for structural durability without being too hard and therefore brittle. Not quite spring temper, but close. In the larger sizes, this makes it difficult to flare as we need for mounting lampshades at tube ends. An easy way around this problem is to fully anneal the very tip of the tube end, which brings it to a dead-soft (for stainless steel) condition. Once annealed it will certainly not be as soft as say, copper, but certainly much softer than before and much easier to work with. The reason we only anneal the very tip of the tube is so the rest remains structurally as strong as possible for good durability.
-
If this method is being used for flaring, we recommend that any tubing bending (for curved-neck streetlights or gooseneck building lights) be performed first and the annealing of the tubing tip be done after bending. A pin-vise does not have to be used when flaring annealed tubing, as you will see below.
-
The annealing process is very simple for the flaring we will be doing, so we don't need fancy laboratory annealing ovens or any such equipment. The only heat source required will be an open flame such as a match, candle or small torch. Your wife's gas range in the kitchen will also work fine but I suggest that if that is your heat source, you wait until she is out shopping.
-
To anneal the tube end we heat the very end until it glows a cherry-red color (just at the very tip only). Then, let it cool to room temperature. That's it... it's all annealed! See figures 3 and 4 below.
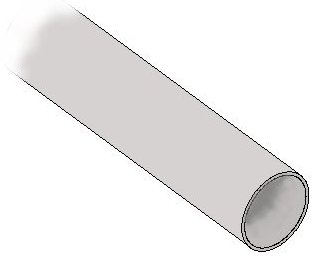
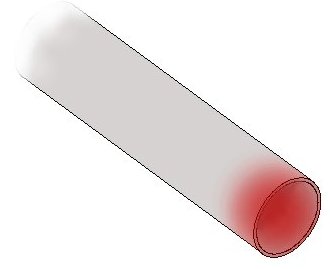
Figure 3 Figure 4
-
Once the tubing has cooled, it can be pulled through a piece of fine steel wool a few times to remove the dark sooty appearance at the end.
-
The tubing can now be clamped in a soft-jawed bench vise or any holding fixture that will keep it steady on the workbench. It should be positioned so the tube end is facing up and toward you.
-
As with the cold flaring method above, a small straight pin or needle will be used, but tapping on the pin or needle won't be necessary. The needle will be placed into the end of the tube and a slight side-to-side and front-to-back "prying" motion will distort the end of the tube into a flared-like shape. See figure 5 below.
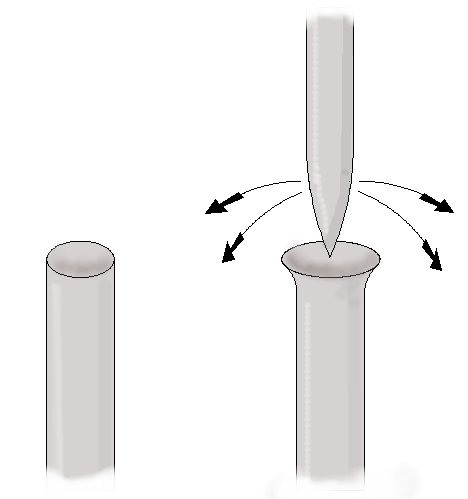
Figure 5
-
The purpose here is not to make a perfectly symmetrical looking flare (horn-like shape), but to give the tube end a fairly even flare that will keep the lampshade in position while the epoxy placed on the rim of the flare on which the lampshade is seated, can fully cure.
This completes the tubing flaring procedures.
© 2008 Ngineering